MongoDB integrates seamlessly with Next.js to provide efficient data storage and retrieval for full-stack applications through API route handlers and database operations.
- Connect a Next.js application to MongoDB.
- Configure database connection using environment variables.
- Create API route handlers for database operations.
- Insert and retrieve data from MongoDB collections.
Steps to Integrate MongoDB
Follow the steps below to integrate MongoDB into a Next.js application.
Step 1: Create a New Next.js Application
npx create-next-app@latest user-next-app
cd user-next-app
Step 2: Install the MongoDB Driver
Install the official MongoDB Node.js driver.
npm install mongodbStep 3: Create a MongoDB Atlas Cluster
- Sign in to MongoDB Atlas.
- Create a new cluster.
- Create a database user.
- Whitelist your IP address.
- Copy the connection string.
Step 4: Configure Environment Variables
Create a .env.local file in the project root.
MONGODB_URI=mongodb+srv://<username>:<password>@cluster.mongodb.net/
MONGODB_DB=user_data_db
Step 5: Create a MongoDB Connection Utility
Create the following file:
lib/mongodb.jsimport { MongoClient } from "mongodb";
const uri = process.env.MONGODB_URI;
const client = new MongoClient(uri);
export async function connectDB() {
await client.connect();
return client.db(process.env.MONGODB_DB);
}
Step 6: Create API Route Handlers
Create the following folders:
app/
└── api/
    ├── saveData/
    │      route.js
    └── getAllData/
           route.js
import { connectDB } from "@/lib/mongodb";

export async function POST(request) {
    try {
        const { data } = await request.json();

        const db = await connectDB();

        await db.collection("user_data_collection").insertOne({
            data,
        });

        return Response.json({
            message: "Data saved successfully!",
        });
    } catch (error) {
        console.error("Save Data Error:", error);

        return Response.json(
            {
                error: error.message || "Failed to save data.",
            },
            {
                status: 500,
            }
        );
    }
}
import { connectDB } from "@/lib/mongodb";

export async function GET() {
    try {
        const db = await connectDB();

        const data = await db
            .collection("user_data_collection")
            .find({})
            .toArray();

        return Response.json(data);
    } catch (error) {
        console.error("Get Data Error:", error);

        return Response.json(
            {
                error: error.message || "Failed to fetch data.",
            },
            {
                status: 500,
            }
        );
    }
}
Step 7: Build the User Interface
Create:
"use client";

import { useState } from "react";

export default function Home() {
    const [inputData, setInputData] = useState("");
    const [allData, setAllData] = useState([]);

    async function saveData() {
        await fetch("/api/saveData", {
            method: "POST",
            headers: {
                "Content-Type": "application/json",
            },
            body: JSON.stringify({
                data: inputData,
            }),
        });

        setInputData("");
    }

    async function getData() {
        const response = await fetch("/api/getAllData");
        const data = await response.json();

        if (Array.isArray(data)) {
            setAllData(data);
        } else {
            console.error(data);
            alert(data.error || "Failed to fetch data.");
        }
    }

    return (
        <div style={{ padding: "20px" }}>
            <input
                type="text"
                placeholder="Enter data"
                value={inputData}
                onChange={(e) => setInputData(e.target.value)}
                style={{
                    width: "300px",
                    padding: "10px",
                    border: "1px solid #000",
                    marginBottom: "15px",
                }}
            />

            <br />

            <button
                onClick={saveData}
                style={{
                    padding: "10px 20px",
                    backgroundColor: "#0070f3",
                    color: "white",
                    border: "none",
                    borderRadius: "5px",
                    cursor: "pointer",
                    marginRight: "10px",
                }}
            >
                Save Data
            </button>

            <button
                onClick={getData}
                style={{
                    padding: "10px 20px",
                    backgroundColor: "#28a745",
                    color: "white",
                    border: "none",
                    borderRadius: "5px",
                    cursor: "pointer",
                }}
            >
                Get All Data
            </button>

            <ul style={{ marginTop: "20px" }}>
                {allData.map((item) => (
                    <li key={item._id}>{item.data}</li>
                ))}
            </ul>
        </div>
    );
}
Step 8: Run the Application
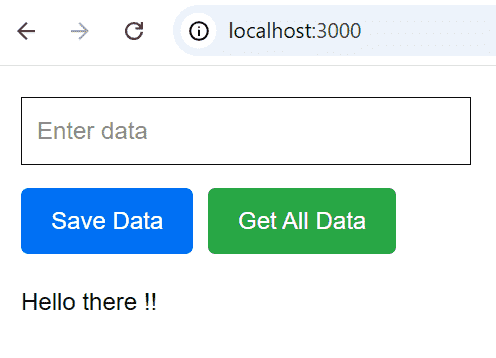
npm run devOpen http://localhost:3000 in your browser to access the application.