

Skeleton Loading in Next.js provides a placeholder UI while content is loading, improving perceived performance and user experience. It visually represents loading elements, ensuring a smoother and more engaging application.
Approach
To add skeleton loading in a Next.js application, we are going to use the react-loading-skeleton package. This package allows us to easily display skeleton placeholders while the content is loading. First, install the package, then import the Skeleton component and display it conditionally.
Steps to Add Skeleton Loading in Next.js
Prerequisite: Before following this tutorial, make sure you have already created a Next.js project. If not, refer to the Next.js Installation and First Application article.
Step 1: Install the required package
Now we will install the react-loading-skeleton NPM package using the below command:
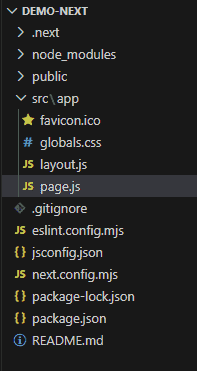
npm install react-loading-skeletonProject Structure:
Step 2: Add Skeleton Loading
Open the src/app/page.js file and add the following code.
// File Path: src/app/page.js
"use client";
import { useState } from "react";
import Skeleton from "react-loading-skeleton";
import "react-loading-skeleton/dist/skeleton.css";
export default function Home() {
    const [loading, setLoading] = useState(false);
    return (
        <main style={{ padding: "30px" }}>
            <label>
                <input
                    type="checkbox"
                    checked={loading}
                    onChange={() => setLoading(!loading)}
                />
                Loading
            </label>
            <div style={{ marginTop: "20px" }}>
                {loading ? (
                    <Skeleton height={30} width={300} />
                ) : (
                    <h2>
                        Next.js Skeleton Loading -
                        GeeksforGeeks
                    </h2>
                )}
            </div>
        </main>
    );
}
Explanation: In the above example, we first import the Skeleton component from the installed package. We then use the useState() hook to manage the loading state. When the checkbox is selected, the Skeleton component is displayed. Otherwise, the actual content is rendered.
Step 3: Run the application
Run the below command in the terminal to run the app.
npm run devOutput:
