


 本文介绍了DOM的基本概念及其在JavaScript中如何操作网页元素的方法。包括通过id、class和标签名选取元素,以及如何添加样式、响应鼠标事件和表单事件等。
什么是DOM?
.
DOM 是 JavaScript 操作网页的接口,全称为“文档对象模型”(Document Object Model)。它的作用是将网页转为一个 JavaScript 对象,从而可以用脚本进行各种操作(比如增删内容)。
DOM 的最小组成单位叫节点,节点的7种类型:
-
Document: 整个文档树的顶层节点 -
DocumentType:doctype标签(比如<!DOCTYPE html>) -
Element:网页的各种HTML标签(比如<body>、<a>等) -
Attr:网页元素的属性(比如class="right") -
Text:标签之间或标签包含的文本 -
Comment:注释 -
DocumentFragment:文档的片段
获取元素
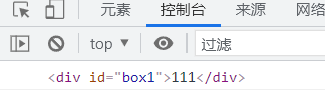
- 通过id获取元素:
语法:
document.querySeletor("#id名");
<body>
    <div id="box1">111</div>
    <script>
        let box = document.querySelector('#box1');
        console.log(box);
    </script>
</body>
- 通过class类名获取元素
语法:
document.querySelector(".类名");
- 通过标签名获取元素
语法:
document.querySelector('标签名');
<body>
    <ul>
        <li>1</li>
        <li>2</li>
        <li>3</li>
    </ul>
    <script>
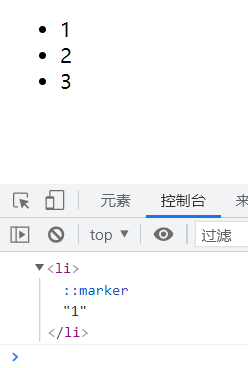
        let box = document.querySelector('ul li');
        console.log(box);
    </script>
</body>
- document.querySelector方法只能获取到一个元素
- 获取多个元素
语法:
document.querySelectorAll('选择器');
.
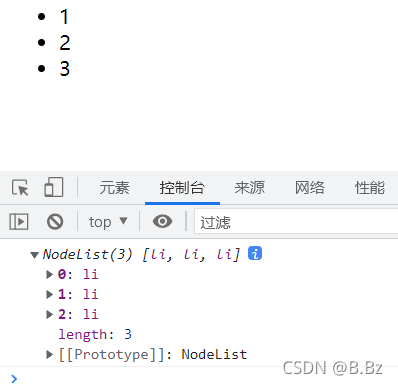
querySelectorAll方法返回一个伪数组
.
<body>
    <ul>
        <li>1</li>
        <li>2</li>
        <li>3</li>
    </ul>
    <script>
        let box = document.querySelectorAll('ul li');
        console.log(box);
    </script>
</body>
CSS操作
操作行内样式
- 添加样式
语法:
// 选择元素
let box1 = document.querySelector("选择器");
// 把box1元素的属性行内样式的display设为none;
box1.style.display = "none";
事件基础
什么是事件?
事件的本质是程序各个组成部分之间的一种通信方式,也是异步编程的一种实现。DOM 支持大量的事件,本章开始介绍 DOM 的事件编程。
简单来说用来html页面和用户交互的
语法:
选择的元素.具体的事件 = function() {
	// 触发事件要做的事情
}
鼠标事件的种类
点击事件:
-
onclick:按下鼠标(通常是按下主按钮)时触发。 -
ondblclick:在同一个元素上双击鼠标时触发。 -
onmousedown:按下鼠标键时触发。 -
onmouseup:释放按下的鼠标键时触发。 -
.
onmousedown和onmouseup就是onclick的分解
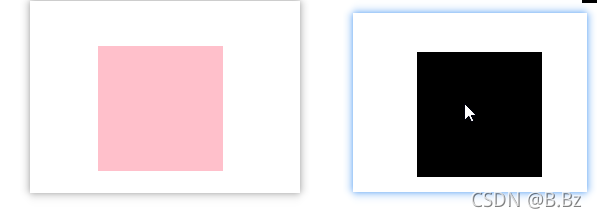
点击盒子变为黑色:
<!DOCTYPE html>
<html lang="en">

<head>
    <meta charset="UTF-8">
    <meta name="viewport" content="width=device-width, initial-scale=1.0">
    <title>Document</title>
    <style>
        div {
            width: 100px;
            height: 100px;
            margin: 100px auto;
        }

        .box1 {
            background-color: pink;
        }

        .box2 {
            background-color: black;
        }
    </style>
</head>

<body>
    <div class="box1"></div>
    <script>
        let box1 = document.querySelector('.box1');
        box1.onclick = function() {
            box1.className = "box2"
        }
    </script>
</body>

</html>
移动事件:
-
onmousemove:当鼠标在一个节点内部移动时触发。当鼠标持续移动时,该事件会连续触发。为了避免性能问题,建议对该事件的监听函数做一些限定,比如限定一段时间内只能运行一次。 -
onmouseenter:鼠标进入一个节点时触发,进入子节点不会触发这个事件。 -
onmouseover:鼠标进入一个节点时触发,进入子节点会再一次触发这个事件。 -
onmouseout:鼠标离开一个节点时触发,离开父节点也会触发这个事件。 -
onmouseleave:鼠标离开一个节点时触发,离开父节点不会触发这个事件。
鼠标移入盒子变为粉色,移出为黑色:
<!DOCTYPE html>
<html lang="en">

<head>
    <meta charset="UTF-8">
    <meta name="viewport" content="width=device-width, initial-scale=1.0">
    <title>Document</title>
    <style>
        div {
            width: 100px;
            height: 100px;
            margin: 100px auto;
        }

        .box1 {
            background-color: pink;
        }

        .box2 {
            background-color: black;
        }
    </style>
</head>

<body>
    <div class="box1"></div>
    <script>
        let box1 = document.querySelector('.box1');
        box1.onmouseover = function() {
            box1.className = "box2"
        }
        box1.onmouseout = function() {
            box1.className = 'box1'
        }
    </script>
</body>

</html>
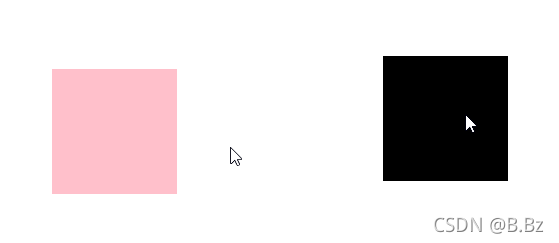
表单事件
输入框聚焦事件: onfocus
鼠标离开输入框聚焦: onblur
代码示例:
<!DOCTYPE html>
<html lang="en">

<head>
    <meta charset="UTF-8">
    <meta name="viewport" content="width=device-width, initial-scale=1.0">
    <meta http-equiv="X-UA-Compatible" content="ie=edge">
    <title>Document</title>
    <style>
        .input_text {
            border: 1px solid #d9d9d9;
            color: #aaa;
            outline: none;
        }

        .input_text_focus {
            border: 1px solid #ffd6db;
            color: #888;
            outline: none;
        }
    </style>
</head>

<body>
    <div class="new_header">
        <div class="new_wrap">
            <form id="hder_login_form_new" method="post">
                <input type="text" class="input_text" id="uname" value="邮箱/ID/手机号">
            </form>
        </div>
    </div>
    <script>
        let ipt = document.querySelector('.input_text');
        ipt.onfocus = function() {
            if (ipt.value == "邮箱/ID/手机号") {
                ipt.value = "";
            }

            ipt.className = 'input_text_focus';
        };

        ipt.onblur = function() {
            if (ipt.value == "") {
                ipt.value = "邮箱/ID/手机号";
            }
            ipt.className = 'input_text';

        };
    </script>
</body>

</html>

文本操作
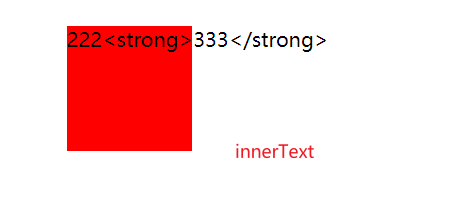
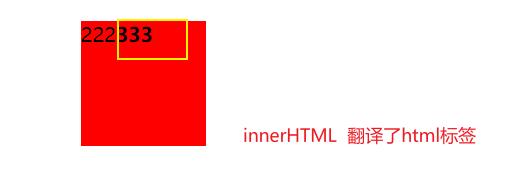
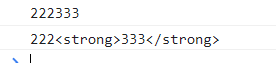
innerText和innerHTML:
共同点: 都可以修改内容,都可以获取内容
不同点: innerText读不出html的标签 innerHTML可以读出并翻译
<!DOCTYPE html>
<html lang="en">

<head>
    <meta charset="UTF-8">
    <meta name="viewport" content="width=device-width, initial-scale=1.0">
    <title>Document</title>
    <style>
        div {
            width: 100px;
            height: 100px;
            margin: 100px auto;
        }

        .box1 {
            background-color: red;
        }
    </style>
</head>

<body>
    <div class="box1">111</div>
    <script>
        let box1 = document.querySelector('.box1');
        box1.innerHTML = '222<strong>333</strong>'
        console.log(box1.innerText);
        console.log(box1.innerHTML);
    </script>
</body>

</html>


 扫一扫
扫一扫


 1875
1875

 被折叠的 条评论
为什么被折叠?
被折叠的 条评论
为什么被折叠?
 到【灌水乐园】发言


